Balmoral Hutch Cover Instructions
What's Included With You Cover:
- 1 Balmoral cover (2 separate sections)
- 5 plastic cover screws
- 1 strap with Velcro ends.
(If for any reason you are missing any of these items then just let us know and we will sort it out.)
Items Needed To Fit The Cover:
- 3 to 5 extra screws (optional)
- Screwdriver or drill
- Small hammer (optional)
- Hairdryer (optional)
- Someone to help (recommended for the 1st fit)
Fitting The Balmoral Cover
It is important that you follow these instructions closely otherwise, you may find it difficult to fit it for the first time.
The Balmoral is a tight fitting cover. It has been specifically designed like this for a reason.
But over time you'll find that the covers stretches a little and fitting it becomes quite straight forward especially after you have done it a few times.
Initially on unpacking the cover out of the bag you'll find it quite rigid. This is because the material and clear plastic we have used are quite thick and the cover has been folded like this for some time.
So we recommend that you first put the cover in a warm place for a few hours before you try to unfold it. This could be next to a radiator or in a warm sunny spot.
Unpacking The Cover
Take care when unpacking.
Do not try and forcefully unfold the cover at any stage as this could end up damaging the plastic.
If you are fitting the cover in the cooler months of the year then we recommend that you use a hairdryer on a low to medium heat to help slightly expand the material and plastic to make it easier to work with.
(You could also use the heat from a radiator if you do not have a hairdryer to hand.)
When you take this extra step you'll find that the cover becomes much easier to handle, unfold from the bag and generally easier to fit too.
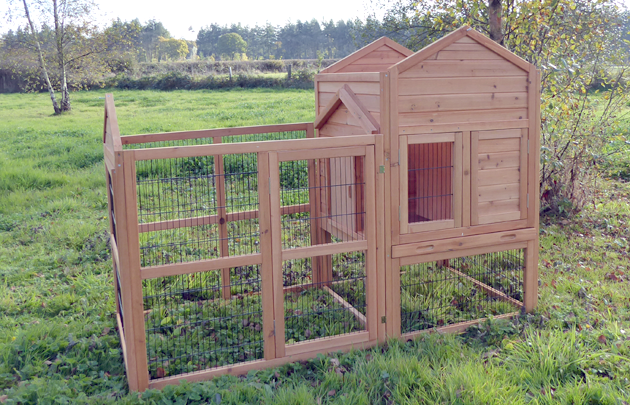
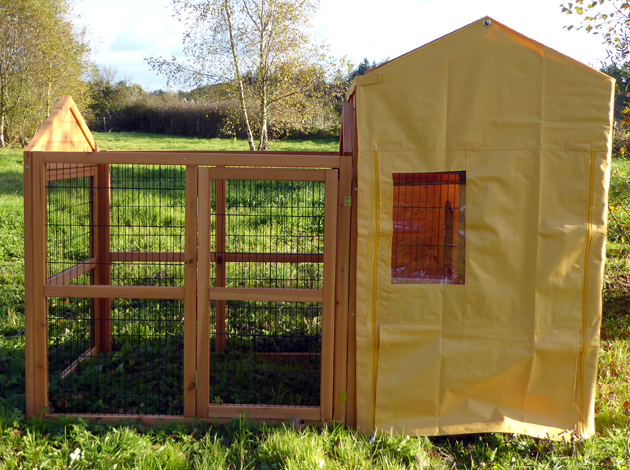
The hutch cover is made up of two main sections. The main house and the run.
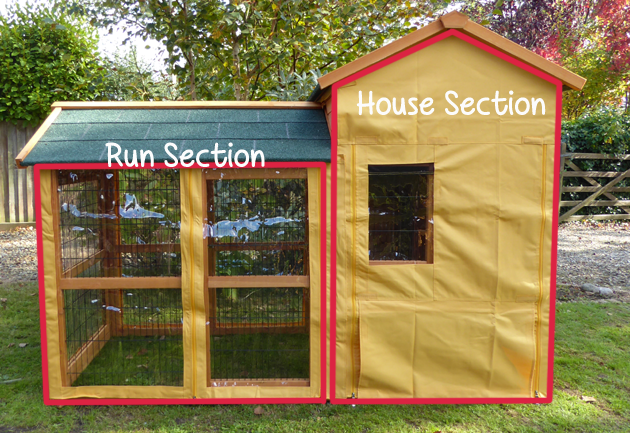
You should also have received 1 support strip with Velcro on each end and 5 little plastic tipped screws and metal parts.
Step 1:
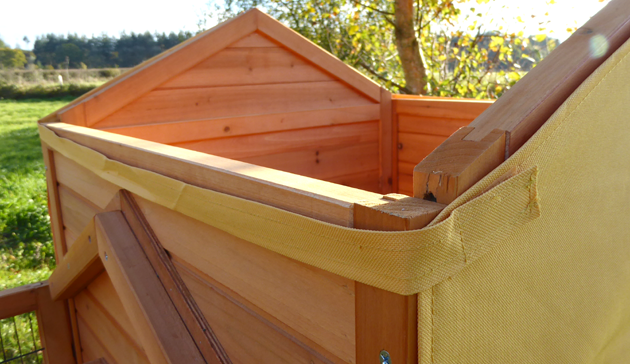
*TIP* It is easier to fit the cover for the first time without the roof panels or ridge cap in place.
Carefully remove the ridge cap and the roofing panels of the main house and run. (Once you have fitted the cover you will not need to remove these panel each time you want to remove the cover.)
Step 2:
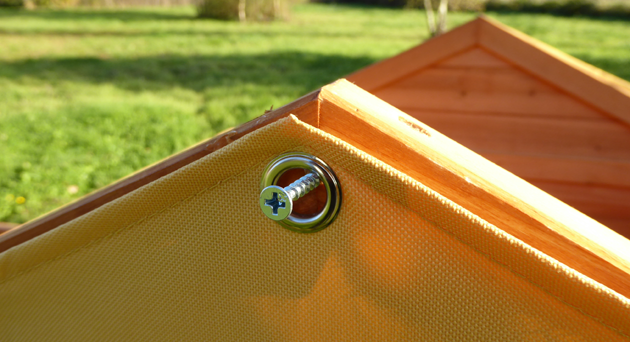
There are two metal eyelets at the tips of the cover. These, in conjunction with the plastic screws, are used to hold the cover in place.
For now, the easiest most simple way forward is to use a screw to temporality hold up the top of the cover so you can free up your hands.
Make sure that you leave enough space so you can fit the ridge cap on later.

Hang the cover on these two temporary screws (making sure the clear plastic window is at the front) and then attach the supplied velcro strip to one side of the main house section.
*TIP*: Having someone help you with the aligning of the cover and pulling it tight will make it much easier.
Next wrap the main house cover section around your hutch making sure that it is straight and centered before securing the other side of the house to the strap.
Your cover should now look a little like this.
Step 3:
TIP: lay the run section of you cover out on your lawn /patio/deck so you can identify the front and back of it. The front will have zippers for the front door of the run and the back does not.
TIP: carefully heating the clear plastic on the run section helps make the cover easier to fit.
3a. Attach the run section of the cover to the Velcro strip on the BACK of the main housing section.
3b. Pulling tightly from the top and bottom of the cover slowly and firmly wrap it around the run section of the hutch joining it to the Velcro at the front of the house.
Make sure that all the corners line up and that the cover is straight. You will probably need a few goes to get this right.
>
TIP: Having someone help you with the aligning of the cover and pulling it tight will make it much easier.
3c. When joining the run section to the front of the main house section it helps to have a 2nd person pull the bottom of the house section down and towards the adjoining run section.
Fitting The Screws For The Eyelets:
There are 5 metal eyelets for the run and house sections of the Balmoral Hutch cover. You have a few options available to you. The easiest is simply to use a screw to hold up the cover.
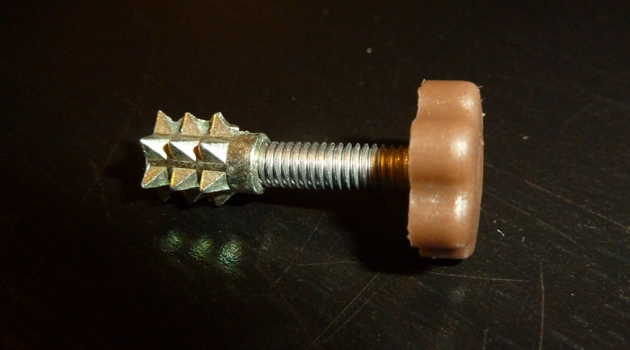
Alternatively, you can fit the special fittings that have been supplied. There are two parts to these fitting; the plastic tipped screw and metal part that goes into the woodwork.
The easiest way is to use a drill to create a pilot hole.
If you don't have a drill and suitable sized drill bit then you can use a screw and a screwdriver.
Simply screw and unscrew it a few times to start to make the pilot hole and then using the tip of the screwdriver create the hole.
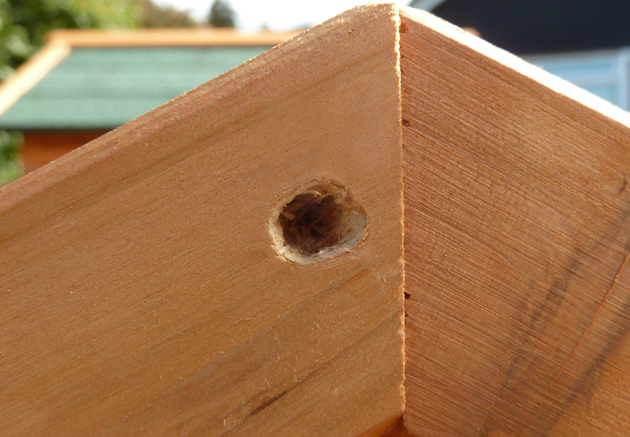
Next, you will need to push the metal part of the fitting into the hole you have created and then using a hammer carefully tap it into place.
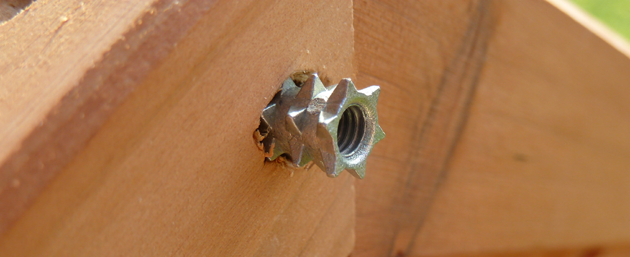
Important: Make sure you support the panel from behind when you are hammering. You don't need to use excessive force. If the hole is big enough it will go in without too much effort.
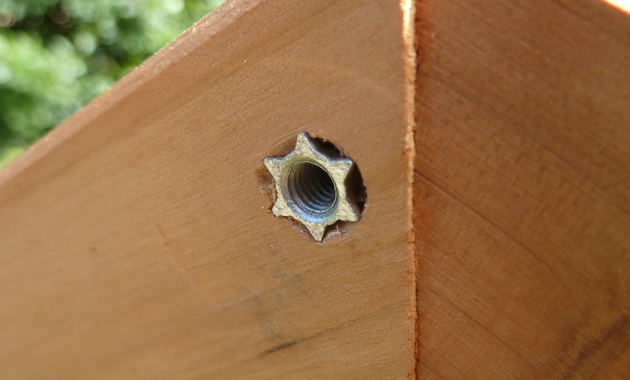
Next, attach the plastic screw.
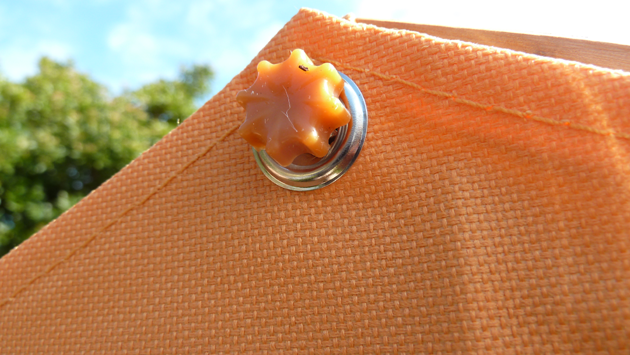
In total, there are 5 eyelets strategically positioned around your hutch. Two on the main housing section (front and back), one at the end of the run, and two more in the middle of the front and back run panels. We recommend you make use of all 5 so your cover is fully supported.
Manufacturers And Our Recommendations:
- In warm weather your hutch can get dangerously hot if the cover is left on. We recommend that you remove your cover during warm weather.
- We also recommend that you allow your cover and hutch to air
out regularly, especially after long periods of wet or damp
weather. Failure to do so can result in a build-up of mold and cause
the cover to degrade at a much faster pace.
- During periods of prolonged rain, the hutch cover will become saturated
and the inside of the cover can become wet. To prolong the life and
enhances the performance of your hutch cover especially during wet periods
the manufacturer recommends Nikwax
.